How to Broadcast to SHOUTcast Live from a MAC
We have many customers who are using the MAC platform and they ask us often; How to broadcast to SHOUTcast live from a MAC? Unfortunately the traditional Winamp and SHOUTcast DSP plugin are not compatible with MAC, so that leaves Apple users scratching their heads trying to figure out what they can do without having to switch to Windows. The fantastic FREE tool we are going to show you is called BUTT. Remember BUTT is used to stream your audio source or soundcard. So you will need software , external mixer or DJ controller to play your music.
Here are the steps required to begin streaming with BUTT.
- Download BUTT here and follow the instructions to install it. Make sure you install on the computer that has your audio source.
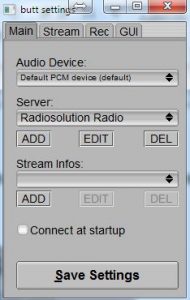
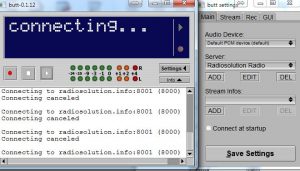
- Click on the Main tab. You will see three things that you can edit. Audio Device, Server, Stream Infos and Connect at Startup. Make sure you select the right sound source in Audio Device.
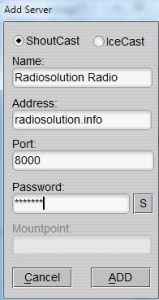
- To add your server provided by Radiosolution click on Add underneath Server. Another window will pop up with important server details to enter.
Name: The name of your radio station
Address: Input the IP address or URL of your server
Port: Input the port provided by Radiosolution
Mount Point: Input something here only if you are using Icecast. Nothing goes here if you are using SHOUTcast (e.g. /live)
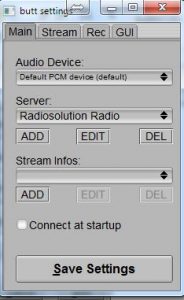
- Double check that the settings are correctly inputted. If everything is fine click ADD and then when you get back to the Main tab click Save Settings. Use Edit to change the settings at a later date or DELETE to remove the server.
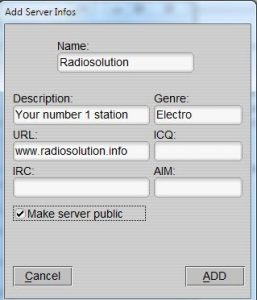
- To add your server streaming info, click ADD under Stream Infos. You can edit stream information like stream title name, description, genre, website and various messenger details. You can check off the box if you want to make your stream public. Keep it empty if you want the server to remain private.
- Under the stream tab you can configure your stream settings. In the image below you will find the preset Bitrate, SampleRate, Channel and Codec. After you have entered these settings, click the main tab and Save Settings
- When you have completed adding your server and stream information, just push ‘play’ to start streaming. This will connect to the specified server that you added. The ‘stop’ button is used to disconnect from the server.

